Big Changes!
February 15, 2014
On February 3, I closed the doors of GreenBridge Architects and rejoined DeStefano Architects in Portsmouth, NH as the Manager of the Residential Studio. It’s an exciting time to be returning. The firm is growing their staff and the reach of their work. The residential studio is an exciting place for me to expand and use my knowledge of green design and the changing practice of residential and especially coastal design. I also get the added benefit of working with an amazing team of brilliant architects.
Lisa DeStefano and I have a long history and friendship. I first joined her firm in 2002 when I moved to the area. I worked with her for over 5 years, and learned volumes about the design of fabulous homes, coastal design…and being from the Midwest, I also had a lot to learn about sloping terrain! Throughout my launching GreenBridge and the ups and downs of having my own practice, Lisa has been a steady resource and supporting friend. I treasured her input and learned from her processes. She is one of the cornerstones of my career and I’m thrilled to be working with her again.
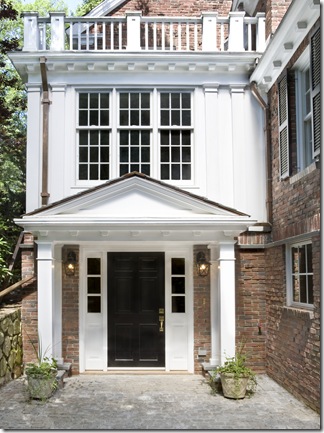
A few of my favorite projects from my DeStefano years…
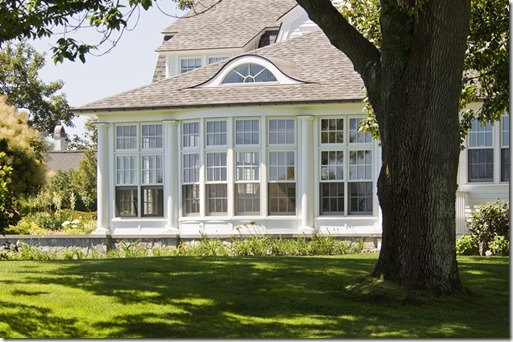
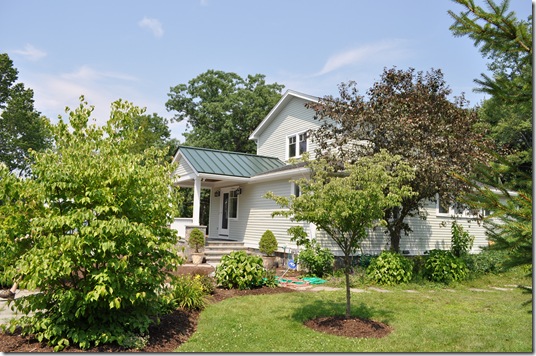
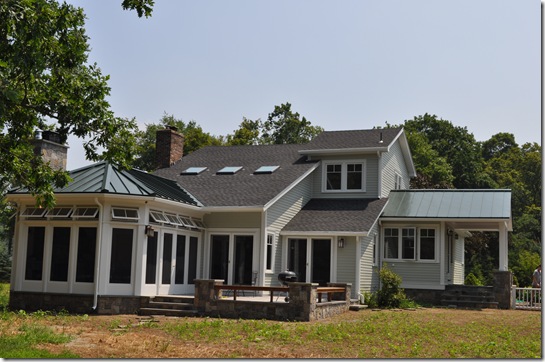
A major addition and renovation for a family home in Kittery Point, ME.
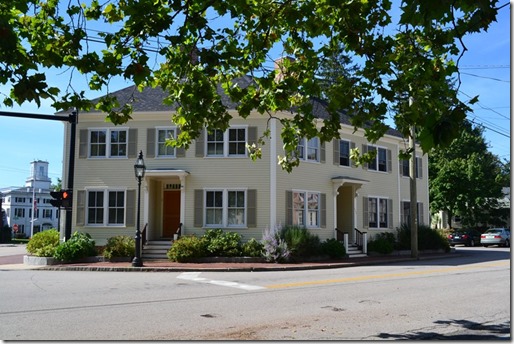
A condominium project at a downtown Portsmouth location
And some memorable GreenBridge work:
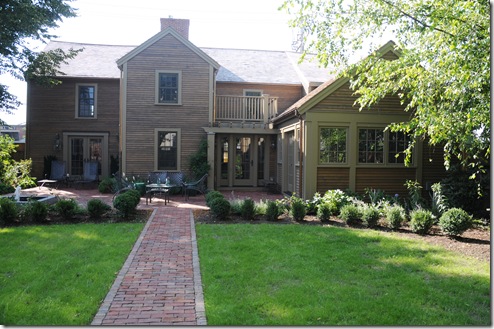
An addition for an historic home in Newburyport, MA
Another addition in Newburyport
A master suite addition in Kensington, NH
I’ve had a wonderful six years at GreenBridge and have been blessed to have some of the most amazing projects and clients. I’ve loved the process of working with them to make their homes more beautiful and work better for their families. I’ve also made some great friends, both clients and allied professionals. Lisa Kawski, Hilary Ward, Sarah Holden, Holly Gagne and Elena Bachrach were some of those allied professionals I met along the way, who became my friends for life. Thanks guys!!
I hope to continue writing the greenbridge blog. At its origin, the name GreenBridge represented the connection of the architect, clients, designer, builders and systems to build great buildings. This concept continues to define my work, so although the firm will not continue, the greenbridge concept (and blog) will.
I hope that you’ll contact me at my new digs. We’re right next to Starbuck’s in Portsmouth (and within spitting distance of 2 other amazing coffee/pastry shops). When you’re in the area, I’d love to meet you for a quick cup.
Best wishes for a healthy and happy year!
Juli MacDonald. DeStefano Architects. 23 High Street. Portsmouth, NH
603.431.8701. jmacdonald@destefanoarchitects.com
Modular on the Merrimack!
July 25, 2013
My son and I just finished a kayak trip on the Merrimack River from downtown Newburyport to Amesbury. If you’re local, Plum Island Kayak is the best – I highly recommend them for a well-planned, safe and beautiful trip. The highlight for me was a fantastic view of our project on the river in Amesbury, a new house constructed with factory-built modules. My experience with modular construction is limited to lots of articles and a visit about 5 years ago to Epoch Modular Homes with my architect pal Hilary Ward. (Modular Homes Field Trip) It was interesting and exciting to see the possibilities of the process, but it wasn’t until this year that I had the opportunity to see one of my own projects go ‘modular’.
We started working with our clients in May of last year. The design process was an amazing one – their clear and concise vision for what they wanted for their home and a stunning site overlooking the Merrimack River were instrumental in our creating a design that as one of them described provided the “desires of (her) heart.”
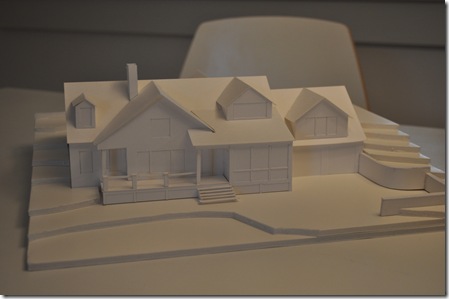
GreenBridge’s model of the design
From the start, our clients were interested in modular construction, both for cost savings and for the efficiencies of the process itself. For construction, they contracted with Bernie Christopher of Great Woods Post and Beam Company, who uses New England Homes out of Claremont, New Hampshire for his modular construction projects. Bernie’s role is to coordinate the construction process and to build all pieces of the project that aren’t feasible or practically built by the modular company. Because of the complexity of the design, there will be more site-built carpentry for this project than a typical modular home.
This is a quick summary of the process with my comments –
- Our clients interviewed 2 modular companies and received prices from both based on the GreenBridge design drawings. At this time, the companies were given the opportunity to weigh in on any aspects of the project’s design that would not work for modular. We didn’t get much feedback on the project’s modular constructability at this time, aside from the size of the modules, which affect transportation costs. For this project our clients were comparing the costs of modular to conventional construction, and the savings were considerable. In retrospect, minimal detail in the modular proposals hampered a fair comparison between the two construction types. In many cases, less-expensive materials and details were assumed in the modular pricing.
- Our clients chose the contractor and modular company. The modular company was given our design drawings to use in creating their own factory-ready construction drawings.
- GreenBridge, our clients and Great Woods Construction reviewed the progress drawings for design consistency and errors. New England Homes revised the drawings as requested. This was an incredibly long, frustrating and drawn-out process! There were many inconsistencies and errors in the progress drawings: most were corrected and some could not be changed because of the requirements of modular construction. During this phase, pricing was reviewed and changes to the scope were reconciled. We are so fortunate that our clients understood the importance of our role in the project during this phase to review the drawings and to make sure the design intent was carried-through.
- Once the drawings were approved, the factory constructed the modular pieces. This went quickly – about 6 weeks.
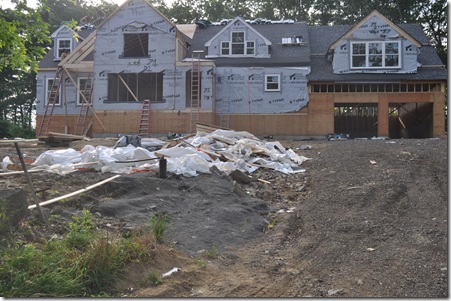
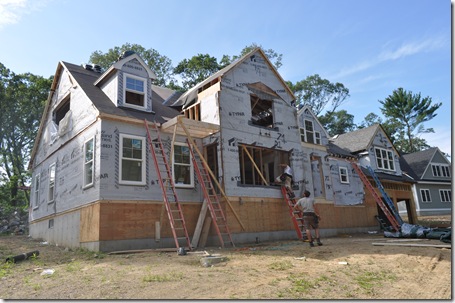
- The pieces were installed on site by New England Homes. (The grading and foundation were completed in advance.) It was so fun to visit the site on the day of installation and see walls paint-ready with doors, windows, trims and light-fixtures installed! We were all thrilled to see the amazing views to the river and to walk through the new spaces.
- Bernie and Great Woods are now working on completing those items not included in the modular package – siding, decks, stairways, and some interior detailing. The Kitchen cabinetry and other cabinetry are also outside of the modular package. These items are being designed by the wonderful Emilie at Carriagetown Kitchens in Amesbury and will be installed by Great Woods. We’re working on revised landscaping and grading designs and the detailing of the front and rear decks.
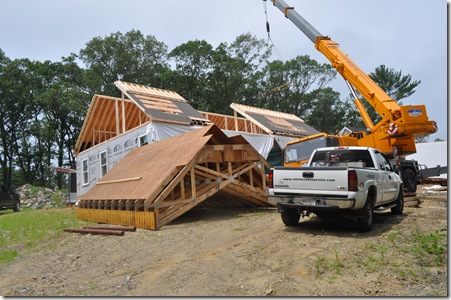
Installation day! The gable roof in the yard is waiting for installation at the back wing of the house. The crane’s availability drives the schedule.
The water-side elevation. There will be a screened porch left of the garage and a porch across the front of the house.
Another view of the front – the grade will be built up to decrease the height to the porch level.
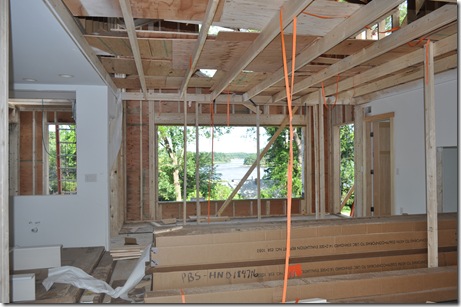
View from the Living Room down the river. The framing at the ceiling level will be removed to open up the cathedral ceiling.
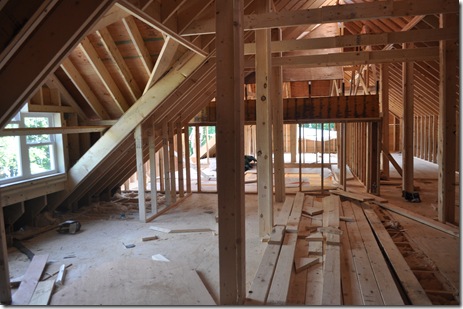
The upstairs will be finished at a future date. The trusses were factory-built and hinged so they could be folded up for their ride to the site.
The process has been a long and in some ways grueling one, but there is a light at the end of the tunnel! Our clients are thrilled with their new home and can’t wait to move in. I’ve asked for the second floor southwest room, but am not sure if I’m getting it or not…
The modular design and construction process has been difficult and lengthy, but it did save our clients money. It was exciting and even shocking to see the speed of the installation, but we are somewhat relieved that the balance of the project is now in the hands of carpenters on site. It’s going to be a beautiful project – we’re happy to be a part of it.
If you would like to chat about modular construction or summer on the Merrimack feel free to contact us. Enjoy the rest of the summer!
With best wishes,
Juli MacDonald, GreenBridge Architects
Net-Zero and the Perfect Margarita
June 15, 2013
Have you heard of net-zero? It’s a term that’s being used in architecture, construction and more recently, real estate circles. This month, GreenBridge Architects is gearing up for the design of a new home for future neighbors here in Amesbury, MA, and our clients want to ‘get close’ to net-zero. So we’re booting up our spreadsheets, consultants and specification data to help them get there.
But first, since I’m writing this at the cusp of summer on my sun-filled patio, let’s discuss the perfect margarita. This was passed on to me by my friend and architect Kate Hauserman, who always knows what to drink for the occasion and when to take note of a perfect day.
The Perfect Margarita
Ingredients
1-1/2 oz tequila (Patron is worth it)
1 oz Cointreau
½ oz lemon juice (freshly squeezed – one lemon)
½ cup shaved (or crushed) ice
1) Salt rim of glass: To salt rim, place a thin layer of salt in a small dish or bowl, take empty glass and moisten its rim with a lemon wedge and dip the rim in the salt
2)Place all ingredients in a shaker and shake
3)Strain or serve with ice
Ok, got that out of the way. So with drink in hand….
Net -zero Homes
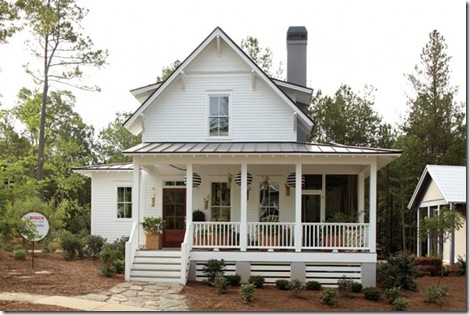
The Bosch Net Zero Home in Serenbe, Georgia. For more information on this house, see the article at The Great Energy Challenge.
First -What is net-zero? A net-zero home is one that produces as much energy on site as the energy used over the course of a year. Typically energy demand is greatly reduced by construction methods and efficient equipment and energy production is achieved using photo-voltaic systems (PV or solar panels).
Why Does It Matter
Buildings worldwide account for 40% of our primary energy use, and 24% of all greenhouse gas emissions. Achieving net-zero in our homes and buildings will have a major impact on our energy-security and the health of the planet.
How to Build a Net-Zero House
Achieving net-zero requires disciplined decision-making, a systems approach, and larger front-end construction costs. These costs may seem prohibitive for the typical family, but it’s important to remember they are fixed and one-time costs that can be included in your mortgage. In this way, you are paying for your energy costs as part of your mortgage and not in future unpredictable energy bills. The following is a general overview of the four steps involved.
1. Build Only What you Need
A careful design process that aims to keep the footprint small creates a home that has less space that needs to be heated, cooled and lighted (and cleaned!) Multi-use spaces, adaptable spaces planned for changes in the family, and modest, well-proportioned room sizes help to create an efficient home. Sarah Suzanka in her Not So Big House Series offers a wealth of insights and solutions toward building small.
2. Build a Highly Efficient Envelope
Your ‘building envelope’ is everything that separates the inside from the outside: the walls, roof, floor slab, windows and doors. Your mechanical system’s job is to make the interior of your house comfortable by moderating the interior air. An efficient, highly insulated envelope is a separation that allows minimal heat or cooling to move between the inside and the outside, requiring less work (energy) of the mechanical equipment. Less work means smaller equipment and less energy.
3. Reduce energy demand.
-The careful design of your home will include using these same efficient windows that are integral to your building envelope to assist with the reduction of energy demands. Well-placed windows and the architecture and landscape designed around them will at the right times of the year allow the sun to heat and light the room, bring in a cool breeze through heavily shaded trees, or lead hot air up and out of the house.
-Use the highest-efficiency mechanical system and water heating equipment you can purchase. The reduction in demand from steps taken above will help keep the systems smaller. The selection of your equipment should be done with care, with the entire construction and design team factoring all items specific to your home: the design, the site, your energy use, against the efficiencies and costs of available mechanical systems.
-Efficient appliances, water heating, lighting and other electrical equipment are the other big generators of energy demand in your home. Besides the energy used in their function, they create additional heat within the building envelope—heat that your mechanical system then has to use energy to remove in summer months. To reduce demand of these items, install only those appliances you really need and select the most efficient you can afford.
– Gaining control of the “ghost loads”, power used by all those computers, printers, and TV’s and appliances that have lights glowing around the clock, can make or break achieving net-zero. In most homes today, ghost loads can account for around 25% of all electrical power use. Informed appliance selection and the use of timers and power-off outlet strips can help with this feat, as will energy monitoring systems that can track your changes and these extra energy loads.
4. Add Solar
For a net-zero home, you need to now balance the energy ledger, and generate the amount of energy to equal the demand. Solar panels are the most common answer for electrical power, although small wind turbine technology is making wind power equally attractive in some areas. In addition to photovoltaics, solar power can heat not only the water in your hot water tank, but also your whole house, if you use a radiant hot water heating system. All net-zero houses must have some combination of these energy-harvesting systems.
As always, we’d love to hear your comments or questions. You can give us a call at 978-518-2811 or email us at info@greenbridgearchitects.com.
Thank you to the Green Architect’s Lounge with architects Phil Kaplan and Chris Briley for their seasoned information and inspiring mix of knowledge and drink recipes!
In our next post, we’ll be looking at the installation of a modular home designed by GreenBridge. Happy Summer!
The Hobbit House visited
January 27, 2013
“In a hole in the ground there lived a hobbit. Not a nasty, dirty, wet hole, filled with the ends of worms and an oozy smell, nor yet a dry, bare, sandy hole with nothing in it to sit down on or to eat: it was a hobbit-hole, and that means comfort.” first line of The Hobbit, J.R.R . Tolkien
Just got back from finally seeing The Hobbit with my youngest son. Seeing movies with my kids is often a chance for a decent nap, but not this time. Although I have to admit I’ve never had much interest in the Hobbit series, Bilbo Baggins’ house, Bagsend, was incredible! I completely understood his desire to get back to it (and his books!) throughout the movie, especially when every character encountered was more frightening and UGLY than the last…
The Hobbit house set was built in New Zealand….
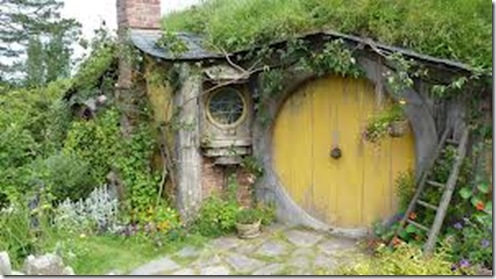
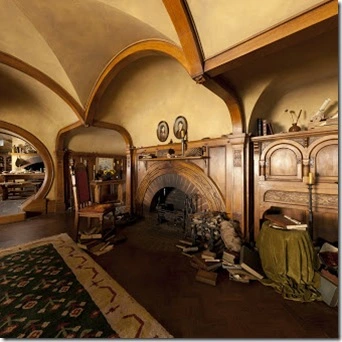
Exterior of the home and garden. Nestled into the hill, the home is mostly underground. Throughout the home, the color, texture and attention to finely executed detail is breathtaking.
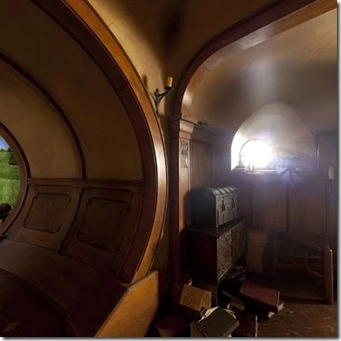
Circular doorways sometimes require climbing over the curved threshold. Worth it.
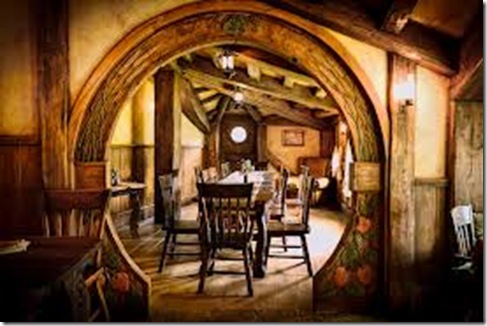
The curved plaster ceilings are reminiscent of a wine cellar and the comforting curved shapes are everywhere.
I was struck by the soft light and shadow throughout.
During the movie, I did start fantasizing about living in a Hobbit House, what would it take? Judging from Google, lots of others are looking at this as a viable option. Here is a great look at what it would cost in real life….How Much Does Bilbo Baggins’ House Really Cost?
“It was a hobbit-hole, and that means comfort.” Absolutely.
All images from tumblr.com, small-scale.net and the Hobbit app.
Open Studio!
May 29, 2012
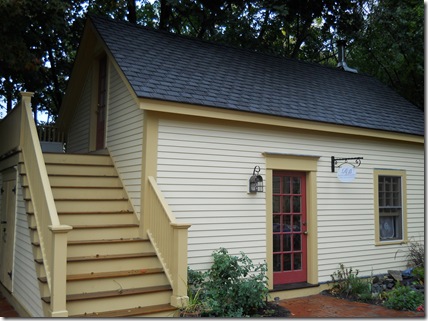
This month has been a milestone for GreenBridge and The Riverview Company. After almost 5 years of being in business, we have moved into our new studio space! I wanted to give you a tour of our new space and share its history. Our little barn building was built in the late 18th century. When we first moved to our house, this out-building was nearly falling down the hill to its rear and was 11” out of plumb. It was all potential, but my husband Steven and I loved it at first glance.
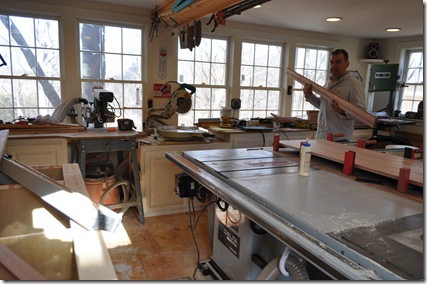
It’s been nine years and slow going construction-wise, diversions like our toddler, then a new baby, challenging careers, LEGOS… all were in collusion to the barn not getting finished. For the most part I didn’t think about it and have made a small office next to the kids’ bedrooms work. Steven (my husband and business partner) pressed on, slow but steady. Within our first week in the house, he raised the rear of the barn and installed new foundation piers. As time went on, he built out the interior of the first floor for his cabinetry shop and repaired the clapboards and trim on the exterior.
Steven in his shop.
He built an amazingly WIDE stair to the second floor space, with careful detailing that gained us a dry storage shed below the stairs.
They’re also great for hanging out
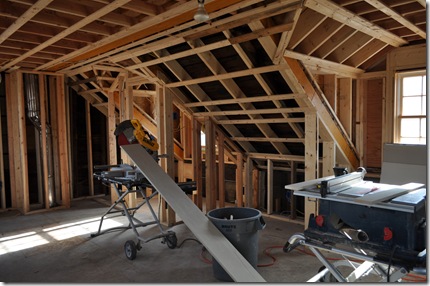
Under construction
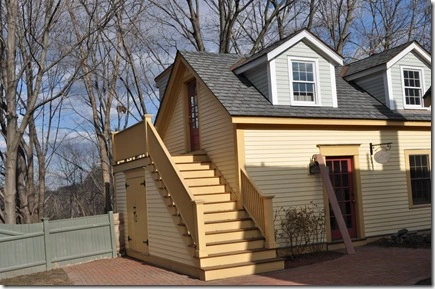
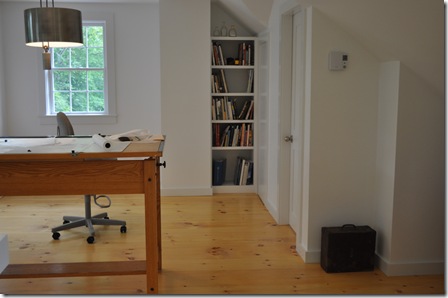
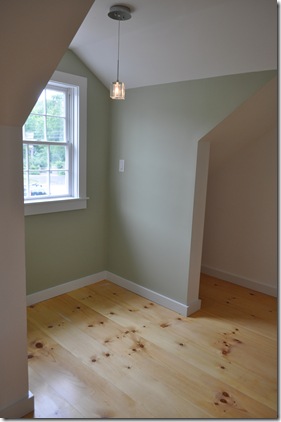
Steven and friends added the dormers last fall, which make the space comfortable and roomy, with space for a future bathroom and storage.
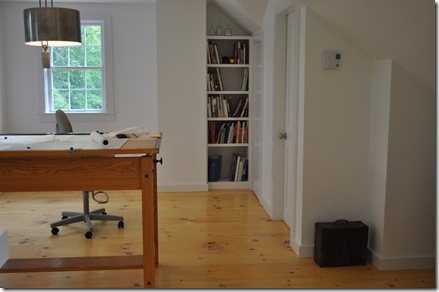
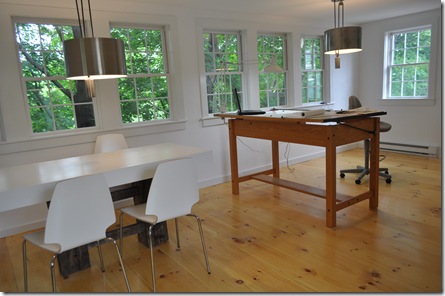
The studio! This view is toward the PowWow River and the little green bridge
Future window-seat location
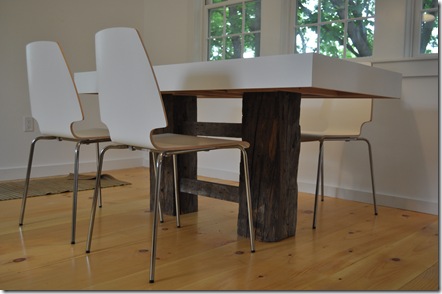
Steven built a beautiful conference table using salvaged lumber from a 17th century Amesbury Point Shore structure, a piece I will always treasure.
I’m thrilled to be in the space and can now testify more strongly than ever to the power of design. This space, so perfect for me and my work, is conducive to happy production, collaboration and creativity.
For more information or to schedule a visit, feel free to contact me at juli@greenbridgearchitects.com
Best wishes for a wonderful summer!
The Front Door
March 21, 2012
I was so excited to see Denise’s blog this month, Façade Face Lift. I love doors and entryways; we get a strong impression of the building or home from the front door. Entries are your first interaction with your home after being away, or for your visiting guests as they arrive to enjoy your company.
One of our newest additions in Wellesley and one of my favorites. Our client loves the special detail of the small overhead light that is activated by a motion-sensor – perfect for key-finding. Construction by The Riverview Company.
Many homes have entry design challenges that fall under a few categories. Do you recognize your own home in any of these scenarios?
1. Come on in, but please don’t look. Nobody uses the front door, and the back door is ugly and doesn’t work. This item is especially prevalent in older homes built before most everybody had cars. Once most people had cars and garages, the closest door to the drive, often a small back or side door next to the kitchen, became the most used door for the house.
This was the family and guest main entry, hidden behind the garage. The door is right next to their Eating Area table.
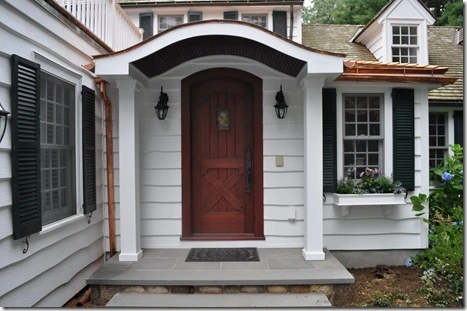
A new generous entry is in keeping with the rest of this lovely Wellesley home. Our client filled her window boxes as soon as they were finished. Construction by The Riverview Company.
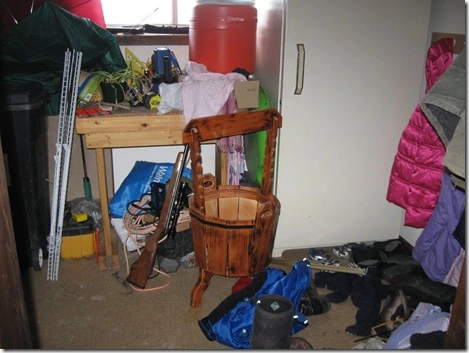
2. Where’s my right boot? No easy storage at the family’s entry. The word ‘easy’ is important here. If you and/or your family are normal, shoes, coat, keys and purses will be deposited on the first surface available. Thoughtfully designed storage with habits and lifestyles in mind makes a big difference. I like to design hooks and a kick-under bench, but with a closet to shift items as items pile up on the hooks and under/on the bench.
Taken from the web….but most of us can relate. except for the mini-well (?)
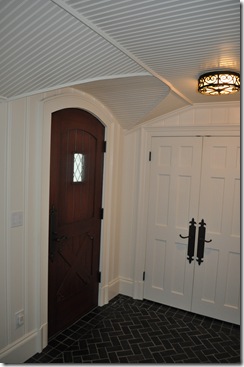
For this new basement entry, we added lots of storage with hooks, a closet, open shelving and a lift-top bench. Construction by The Riverview Company.
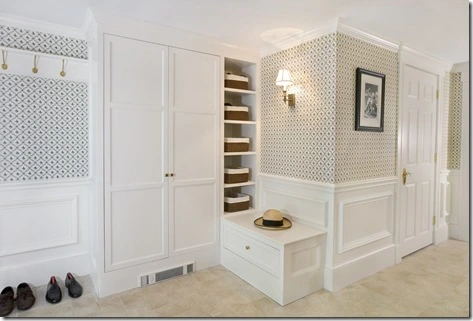
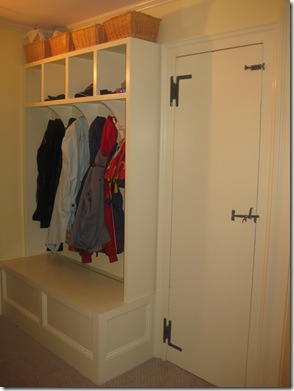
As part of this addition, we created a generous formal entry space with large closets. Construction by The Riverview Company.
A small custom built-in with cubbies and a lift-top bench where space was limited. Construction by The Riverview Company.
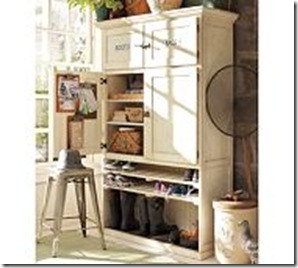
A free-standing storage system can work wonders. These are from Pottery Barn.
3. Hello? Can’t find the door or don’t know which one to approach. This is one of those challenges that we don’t think of until we have visitors and think about our home from their perspective. If you need to give directions to the door before you have a visitor, this might be an issue for your house.
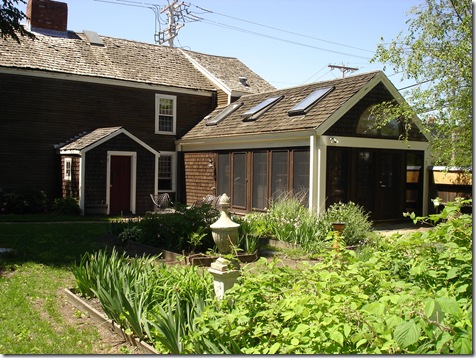
You would think you’d go in the middle door in the back, well you don’t. That would bring you to a tiny space leading to two tiny doors that will take you to the living spaces. So you can pick from one of the many doors on the ‘L’ which will bring you right into the Kitchen or the Eating Area.
As part of the renovation and addition, we created a clearly defined entry using a pergola, lighting and sidelights on either side of the French door. Construction by Becker Builders.
4. Door in name only. The front formal door is used at Halloween only. Reasons vary – maybe it can’t be seen easily, or it has no character, or other design problems making it uninviting, or common in new construction, there is no walkway leading to it!!
I wouldn’t trick or treat here!
We love projects like this – let’s get drawing!!
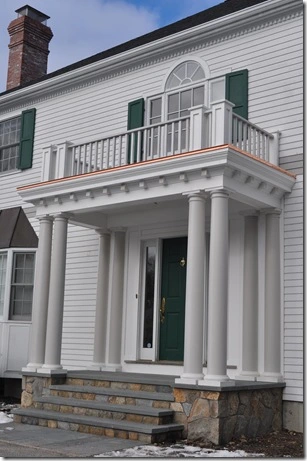
The rebuilt entry and porch have rich classical detailing, with inviting lighting, a generous landing with wide steps, AND a new walkway from the drive. Construction by The Riverview Company.
This new entry in Georgetown, complete with new garden walls and paving (by UBLA design) was transformative. Constructed by Meadowview Builders.
If your home has any of these ‘issues’, rest assured, you can make it better. The ideal entry is one where the landscape welcomes and brings you to a protected and well-detailed doorway, and on the interior has generous space and thoughtfully planned storage. Feel free to contact me if you’d like some assistance with your design plans and estimates of associated costs.
Happy Spring!
Juli MacDonald
GreenBridge Architects
juli@greenbridgearchitects.com
978.518.2811
Intrigued by Geothermal?
February 13, 2012
In my experience, geothermal systems are generally desired but widely misunderstood. Many of us understand that geothermal systems take advantage of the earth’s temperature to heat and cool buildings, that they involve deep drilling and that they are expensive to install, but cheaper to run that conventional heating and cooling equipment. Beyond that, general knowledge gets dicey.
This blog will give you an overview of geothermal systems, especially as they relate to residential applications. My description of geothermal systems is pulled from April’s Architect Magazine with additional input from Melanie Head at EnergySmart Alternatives. If after reading this, you are interested in geothermal for your own home, I would strongly suggest that you consult with a trained and experienced expert to find out more. My go-to local geothermal expert is EnergySmart Alternatives out of Wakefield, MA. Not only are they experienced installers and contractors, they have a team of engineers who make sure that every installation is done right.
Geothermal Systems – What Are They?
Geothermal systems for buildings, also known as geothermal heat pumps or ground-source heat pumps (GHPs), use the thermal energy stored in the upper portion of the Earth’s crust to heat or cool a building, replacing conventional heating and air-conditioning systems. “The temperature of the Earth down 20 or 30 feet is a relatively constant number year-round, somewhere between 50 and 60 degrees , says John Kelly, the COO of the Geothermal Exchange Organization, a nonprofit trade organization in Washington, D.C. “A geothermal heat pump moves heat to and from the Earth by circulating water through a well.”
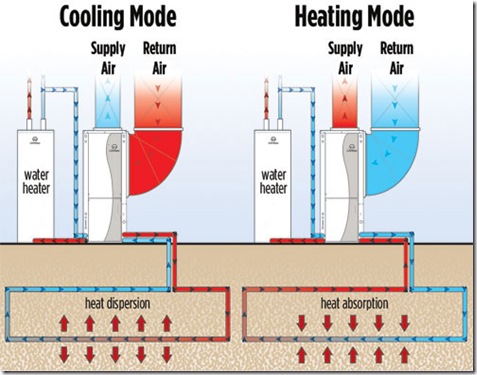
In other words, in winter, a GHP moves the thermal energy from the earth into a building, and in summer it reverses that process, transferring heat from a building into the earth. These systems incorporate a piping loop buried in the ground through which anti-freeze is circulated, and the heat pump extracts the temperature from the anti-freeze and distributes it through the building, much in the same way that central air conditioning works. Alternatively, groundwater is directly circulated through a series of wells.
Either way, GHPs are significantly cheaper to operate than conventional heating and cooling systems. “The cost savings occur because the ground offers starting temperatures closer to what is desired for heating and cooling than the seasonal temperature extremes upon which many conventional air-source HVAC systems rely,” says John Rhyner, a senior project manager at P.W. Grosser Consulting in Bohemia, N.Y., a civil engineering firm that specializes in geothermal. “It takes less energy to make up that smaller difference in temperature,” Rhyner says.
diagram showing heat transfer to and from the Earth in Cooling and Heating Seasons
The three most common types of GHP systems are closed-loop, open-loop, and standing column well.
Open loop systems circulate anti-freeze through a sealed network of pipes buried underground. The anti-freeze within the pipes transfers heat from the earth to the building during the winter, and vice versa during the summer, by way of a heat exchanger. Since the anti-freeze flows in a closed loop, it does not exchange all of its temperature; it can get as warm as 80 to 90 degrees F in summer and as cold as 40 to 30 degrees F in winter. For this reason, the anti-freeze is usually a food-grade antifreeze with freeze protection between 15F to 20F (for example, ethanol) to keep the fluid from gelling during the winter months.
Closed-loop systems can be laid out either horizontally in fields, buried just beneath the frost line, or vertically in wells, bored typically 200 to 500 feet deep. Horizontal systems are generally used for smaller or residential projects with plenty of space. In geographic locations where there are few rocks and bedrock is not present close to the surface, horizontal loops are cheaper to install. However, horizontal loops are affected by outdoor air temperatures, meaning that they can become less efficient as a season progresses as the soil takes on the characteristics of the air temperature.Horizontal loop systems typically require large amounts of land. “For a closed-loop system, it’s all a function of how much pipe you can get in the ground with the open land area you have available to work with,” Rhyner says.
Vertically drilled closed-loop systems are more efficient than horizontal systems, as more of the pipe is in contact with a more constant earth temperature. They are most efficient if they can be drilled into groundwater rather than dry ground, since water is a good conductor of heat. “You get a certain number of tons per linear footage [a ton of heat is 12,000 British thermal units per hour], and can get more pipe in the ground going vertically than horizontally,” says Rhyner.
Standing column wells are another type of open-loop system that is well suited where bedrock is close to the ground surface. Standing column wells are typically less deep than vertical closed-loop systems with similar heat output capacity. Whereas vertical closed-loop borings are typically 250 to 400 feet deep, standing column wells can be anywhere from several hundred feet to over 2,000 feet deep. Steel casing is installed to hold the borehole open up to the depth of bedrock. The remaining depth is drilled through bedrock and is left as an open rock borehole. In these systems, the groundwater is pumped up from the bottom of the well, passed through the GHP, and then returned to the top of the well, where it filters slowly downward, exchanging heat with the surrounding bedrock.
Choosing which of these systems is right for a specific project requires calculating a building’s heating and cooling demand and conducting a subsurface analysis to determine the thermal capacity of the site, and how many wells or how large of a loop field will be needed. If the calculations are done correctly and the system is properly designed, GHPs can handle all of a building’s heating and cooling loads, no matter what climatic conditions prevail.
High Upfront cost versus Return on Investment
When designed and installed correctly, GHPs drastically reduce the amount of energy needed to heat and cool a building. According to the U.S. Environmental Protection Agency, GHPs are 48 percent more efficient than the best gas furnace and 75 percent more efficient than the best oil furnace. They require 25 to 50 percent less energy than other HVAC systems and bring down operation and maintenance costs by as much as 40 percent.
The main inhibitor to the wide-scale adoption of GHPs today is the relatively high up-front cost of installation. The main difference in cost between GHPs and conventional systems is the drilling cost. The mechanical equipment itself—the heat pumps and heat exchangers—is no more expensive than high-efficiency conventional heating and cooling systems. Annual savings on energy bills, however, offset the up-front cost. When taking advantage of the available incentives, payback periods for commercial GHP systems can be as little as 5 to 7 years when replacing an aging, inefficient HVAC system. GHP systems are especially cost-competitive against many conventional systems in new construction. In the past, GHPs were primarily popular with municipal and institutional clients, building owners who planned to inhabit and operate their facilities over the long term, and those who were simply more interested in environmental stewardship than the bottom line. With the currently available incentives and the high price of fossil fuels, payback periods have been significantly reduced making GHPs an attainable investment for more building owners.
The cost of installing a geothermal system can vary depending on site specifics. In existing buildings, challenges like duct routing, construction type, and space restrictions can affect the cost significantly. Such challenges are more easily overcome in new construction where these issues can be discussed with the architect or builder early in the design process. Your chosen geothermal company will be able to assist you with a cost analysis for the system that is best suited for your home. Their analysis will factor in the cost of installing a traditional heating and cooling system, the cost of fossil fuel and the available local and federal incentives. The following links have information on these incentives from both federal and local programs.
Federal Residential Renewable Energy Tax Credit (30% of the price of the system)
Massachusetts Incentives/Policies for Renewables & Efficiency
Local energy company incentives may also be available.
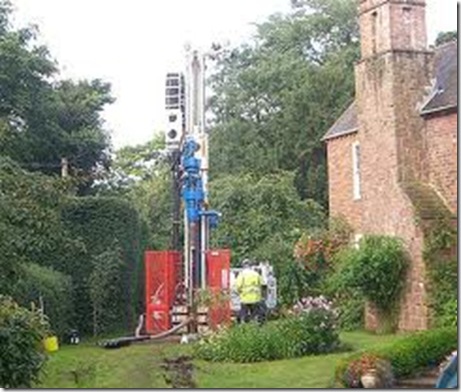
a geothermal drilling rig
Common Myths About Geothermal
It’s surprising how often the same questions and comments arise regarding geothermal systems. The following, part of Energy Smart Alternatives’ ‘Geothermal Demystified’ series, sheds some light on some of these common misunderstandings regarding geothermal installations.
Myth #1: Backup Heating
There is a common misconception that GHPs are not able to provide 100 percent of heating requirements. This simply isn’t true. A properly designed GHP system will provide all of the heating and cooling requirements of the building. There is no need whatsoever to install a gas or oil boiler to provide a backup heat source.
Myth #2: Winter Installation
Transitioning from a fossil fuel heating system to a GHP in the winter can be a challenge. In most cases, the home will be without heat for one or two days while the new geothermal system is being installed. Although a temporary heat source can be used while the transition is being made, some homeowners choose to just add a few layers of clothing.
The drill rig used for vertical installations can drill through bedrock and certainly has the capacity to drill through frozen soil and ice. Trenching in winter can be difficult, though; the degree of difficulty depends on your geographic location and ground cover conditions. When trenching in a small area, a few straw bails can keep the ground from freezing long enough to complete the installation. In some cases, excavators may not be willing to dig in the winter because of wear-and-tear on equipment.
Myth #3 Concerns about bedrock or ledge
Installing a vertical geothermal boring through bedrock is not a problem. Geothermal boreholes are created by cutting and grinding a 6-inch core through bedrock; there is no blasting, hammering, or pile driving. An experienced driller can drill between 200 and 300 feet through solid bedrock in one day. In New England, bedrock will usually be encountered within 50 feet of the ground surface and is encountered on almost every single geothermal installation.
Some homeowners have expressed concerns about drilling through bedrock in close proximity to their own, or their neighbors’, basement foundation wall. To my knowledge, no foundation damage has ever occurred – even when the borings were advanced within 10 to 15 feet of a foundation wall. The drilling will not cause an earthquake. It will not rattle the entire neighborhood.
Shallow bedrock can be an obstacle to horizontal closed-loop installations where hundreds of linear feet of trench are required. It can also be a problem when trenching between the location of vertical borings and the basement foundation wall. A careful evaluation of the site prior to digging will dictate the location of drilling or excavation so as to minimize encounters with ledge during excavation activities.
Myth #4 Concerns about wasting money on drilling.
EnergySmart’s team has installed over 200 tons of geothermal heating systems throughout New England and there has never been a situation where drilling has occurred and the installation has not been completed. First, it starts with an understanding of how the underground components of a geothermal systems actually work.
For both horizontal and vertical closed-loop systems, the heat transfer occurs between the soil or bedrock and the geothermal piping to the antifreeze circulating through the pipe. While groundwater improves the heat transfer properties of the underground portions of a closed-loop system, the presence of copious amounts of groundwater is not absolutely critical to the operation of the system. The presence or absence of groundwater should be accounted for in the design process but does not preclude the installation and effective operation of a GHP system.
Open-loop systems circulate groundwater through the GHP system. It is imperative that the well has enough capacity to support the geothermal system. Low well capacity can be overcome by fracking the well or deepening the well to increase its capacity and yield (this is a chemical-free fracking technique that is completely different from that used by the natural gas industry). In extreme cases, systems that were originally intended to be open-loop can be converted to closed-loop when the well doesn’t produce sufficient good quality water. Similarly, if salt water or hard water is encountered, systems originally intended to be open-loop can be converted to closed-loop where water quality will have no impact.
Thank you to Melanie Head at EnergySmart Alternatives for her valuable information. Feel free to contact EnergySmart Alternatives for more information.
Juli MacDonald, GreenBridge Architects
Best of 2011
December 15, 2011
This year, through our partnership with The Riverview Company, we’ve had some fantastic opportunities to see our design work constructed in Wellesley, Stoneham, Newburyport, Amesbury, Sudbury and Copake, New York. Our project in Copake was by far the most challenging, exciting, and interesting. We thought a recap of the project might be of interest to you and hope you’ll agree.
Copake is about 3 hours away from us, around 2 hours away from most of our subcontractors – a logistical challenge. The clients are an amazing couple we’ve done several projects for at their Wellesley home. This is their vacation home, so they couldn’t be there to see day-to-day progress. In order to take on the project, they wanted the extra assurance gained from our relationship with them. There was never a question in Steven’s (my husband and co-owner of The Riverview Company) or my mind that we’d take this project on; we’d do anything for them.
Program and setting
The multi-acre property is on the outskirts of Copake, a town in the upstate New York Berkshires, on an expansive lake. Ed, the husband, fully aware of its problems, loves this getaway and its quiet and rural character. His wife Mary is of a more urban taste, but cares about the home because he does.
They knew that they wanted to make it look better! Besides that, they also needed a new main entry and a screened porch with a fireplace and grill. New cabinetry and millwork would improve the interior, but they didn’t want to make major changes to wall locations. Other aspects of the project’s requirements included major upgrades to the insulation and mechanicals.
Approach to house, view from street: the awkward entry door opens onto an undefined bedroom or den. It was unclear where to enter the house; the preferred entry was on the garage side. The windows have no trim and the exposed foundation is unattractive.
View toward lake: lots of glass doors in the Living/Ding Room face the view, but the doors were failing. Other than those, one small window from the Kitchen and one from an upstairs bedroom faced the view.
View from the Living Room to the Kitchen: the cathedral ceiling created some sharp, uncomfortable shapes.
View toward the Stair: the large opening was unorganized and plain. The stair (behind the wall with the 3 frames) was narrow and closed.
Kitchen: the owners wanted to keep the same layout, but upgrade appliances, finishes and add color.
The project
Working closely with the owners over the course of several months our plans took shape….
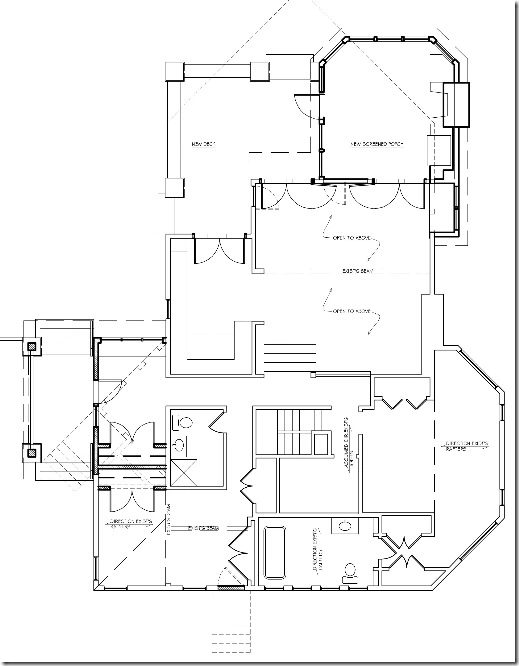
First floor plan: the dark lines show new construction and the tightly dashed lines indicate construction we removed.
The major plan changes were on the left side facing the garage and the rear, or water-side (top of page). The new Screened Porch makes the most of the expansive view and is designed to be a multi-use, multi-season room. In addition to the new Screened Porch, we added French doors from the Kitchen and a large bluestone patio accessible from the Living/Dining Room, the Kitchen and the new Screened Porch. On the garage side of the house, we added an inviting entry porch, with wide stairs accessing the front and rear yards and leading to an enlarged mudroom.
Riverview’s team of carpenters and subcontractors stayed at the house for many overnights during the work. Their continual positive attitudes and talents are what made the project a huge success.
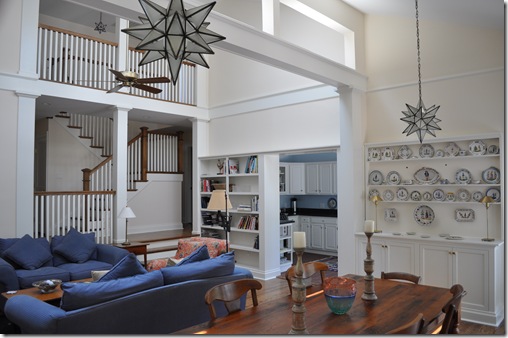
On the interior, we rebuilt the stair and added an open rail to the stair and the balconies. In the large Living/Dining Room, we defined the spaces and ‘dressed them up’ by adding cabinetry and trim. The Dining Area cabinet is built for use as a buffet table and to store the owner’s plate collection.
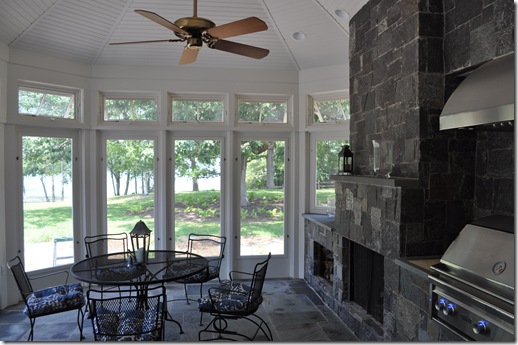
The Screened Porch floor is bluestone and the fireplace wall is made with American Granite. In cooler months, a radiant floor and storm panels make this a 3-4 season room. This quickly became everyone’s favorite space.
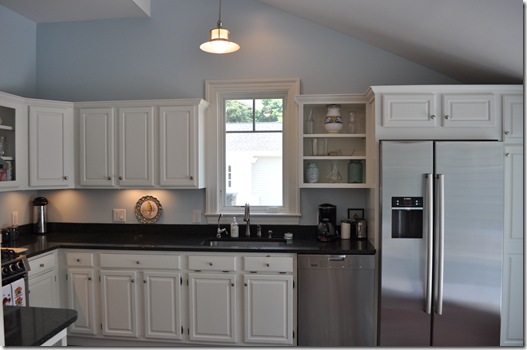
We gave the Kitchen a facelift with a new countertop, appliances and window, and we painted the cabinets and walls. The new French doors open up the room to the lake view.
From the drive, the landscaping and new walk lead to an inviting covered entry porch. We added a stone veneer to the exposed foundation, replaced the siding and added trims.
The lakeside of the home and its outdoor spaces are open to the lake and the view.
Gratitude
For this project, we were fortunate to have incredibly committed and thoughtful clients and dedicated subcontractors. We want to thank The Riverview Company’s stellar carpenters, Stephen Tucker and Brett Belisle and their wives, the subcontractors: Kevin Thibodeau “The Plumber”, Pacewicz Electrical and Nelson Landscaping (stonework) and of course our fabulous clients, Ed and Mary.
Ed and Mary
Happy holidays and best wishes for a joyous new year! Juli and Steven MacDonald
Heat! Upgrades and Incentives
November 7, 2011
The truck idling while the hose is stuck into the side of our house, the oil-smeared shocking bill shoved in our mailbox. We could not live through another year of oil delivery. My husband and I have been pining for a conversion for years, but have put it off because of the costs. We finally bit the bullet and did it – the new gas boiler and indirect water-heater were installed at the end of last week. We have helped our clients with their own oil-to-gas conversions and now have been through the process ourselves. If you are considering such an upgrade or upgrades in your windows or insulation, there are significant financial incentives that can help defray costs – rebates and no-interest heat loans. I hope that reading about our experience will help you in making your home more efficient and comfortable.
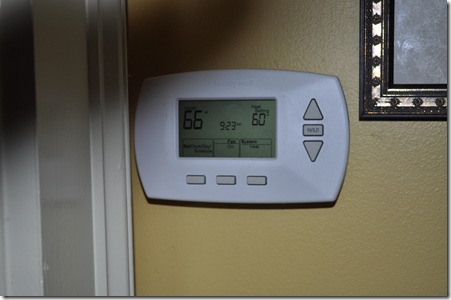
our new thermostat, directing the boiler to slow down for the day
PURCHASE OF UNIT:
We bought our new boiler through National Grid. We purchased a Burnham Alpine 96% efficiency forced hot water unit. We initially were looking at other manufacturers, but buying through National Grid, where the reduced-cost options are limited to American Standard and Burnham, was the best solution for us. The cost of the unit was about $1000 less than retail, which made them far less expensive than the units we looking at, for the same efficiency.
For Massachusetts and New Hampshire, go to www.powerofaction.com and click on “Covert to Natural Gas” to find purchase options and conversion assistance if you need contractor referrals. The site also has a link to tax credit information – these have been greatly reduced for 2011 and presumably for 2012.
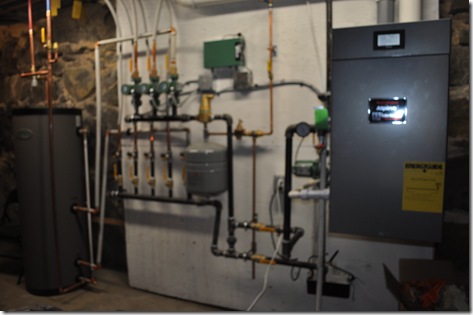
our new boiler and water heater – taking the place of the oil tank
ZERO INTEREST LOAN:
The zero-interest HEAT Loan for insulation and mechanical upgrades in the home, currently offered by many regional and local lenders, is a great way to defray the costs of the upgrades while saving with reduced energy use. MassSave coordinates the process, and although the their employees are helpful with questions, there is quite a bit of homeowner coordination required for the loan process.
The call and the energy assessment report
The process starts with the homeowner making the call to National Grid/MassSave (1-800-696-8077). MassSave then sends a home auditor to perform a free Home Energy Assessment Report for the home. For us, they scheduled an auditor right away – one of us needed to be home while the auditor visited. He took about 3 hours, and had the report for us at the end of his visit. The report is an assessment of the home which includes windows, doors, insulation, air leakage, and mechanical systems. The report includes recommendations for energy-savings and contractors to complete the efficiency upgrades, although the loan process does not require that you use those companies. In addition, insulation and sealant work is offered through National Grid, so for our house, the report also included a proposal for insulation. National Grid subcontracts directly to various companies and the price to the consumer is dramatically reduced with an instant rebate. Our house needs wall insulation – the proposal was for about $4000 with an instant rebate of $2000. Two important notes are that National Grid will inspect the insulation work as part of the assessment program, and for our house, the insulation work will cause some damage to our siding that we’ll be responsible for repairing.
Getting proposals
Once we determined what energy-saving projects we wanted to take on, we needed to get proposals from subcontractors to do the work. In our case, we already had the insulation proposal from the auditor, so we needed to get window supply and installation prices, and the mechanical installation prices. The mechanical subcontractor’s proposal needed to include a heat-loss calculation and the cost of the new equipment (minus the rebate) even though the boiler was being purchase by us. All proposals, the auditor’s report and the loan application form are submitted to MassSave. They process the paperwork, and if all is acceptable, send an Intake Form to the homeowner. The homeowner brings the Intake Form to their chosen bank to use for the Heat Loan.
The Loan
Our understanding is that the loan is a zero-interest seven year loan. If approved, the bank issues 2-party checks for each portion of the work, made out to the contractor and the homeowner. (This assures that the homeowner isn’t using the money to go to Foxwoods.) We are still mid-process for the loan – we’ve submitted our paperwork to MassSave and are waiting for the Intake Form. Ideally, we would’ve started the process in July, secured the loan in August and completed the conversion before heating season. Since we started in October, we needed to buy the boiler and hire the plumbing contractor to install it without the loan. The loan can still cover the work if it has been completed, although obviously the risk with this approach is if we don’t get the loan, we still have to pay the plumber! If we get the loan, we’ll need to cash the checks with our plumber, who will then reimburse us the amount already paid. We know our plumber well – if we didn’t, it would be important to cover these financial maneuvers contractually.
REBATES:
Available through National Grid., the 2011 Residential Efficiency Rebates are for programmable thermostats, high-efficiency heating equipment and water heaters, and combined high-efficiency boiler and water heating units. For our boiler, which is 96% efficient, we’ll get a $1500 rebate and $25 each for the new programmable thermostats (I LOVE THESE). Our indirect water heater will gain us an additional $400. We’ll need a receipt or invoice showing the installation was done by a licensed contractor and the manufacturers name and model number of the units. See www.gasnetworks.com for rebate information and forms.
Our house was built in the 1790s. Every installed technology is a marvel and a beautiful contrast to the hand-sawn timbers and rubble foundation walls. Because we have heating zones in the house now, we are able to go up the stairs without a 20 degree change in temperature. We are thrilled to find that every room is comfortable!!!
Converting to gas does give us some pause, how much better is gas than oil? Dramatically increased efficiency of the heating system helps – and we also plan to install a pellet stove on the first floor to further offset our use of gas. After last month’s power outages, a lot of us are looking to wood and pellet stoves and generators so we can be independent of the grid if needed. When we think about our home’s history, a move toward ‘off-the-grid’ would bring it back to its beginnings, although in a more technologically advanced way.
Feel free to contact me with any questions or if you want to share your own experience through the quagmire of energy incentives. I can be reached at juli@greenbridgearchitects.com or 978.518.2811. Happy heating season!
A Camden Jewel
August 10, 2011
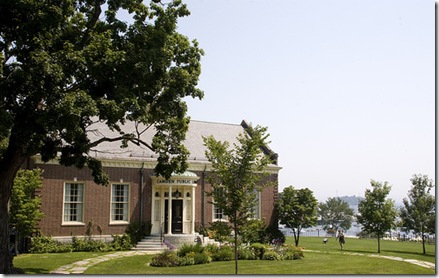
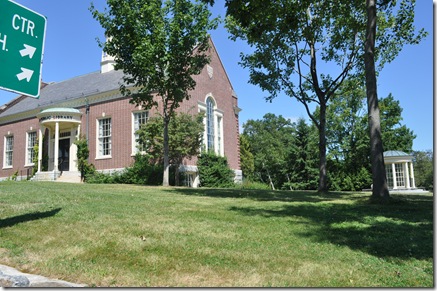
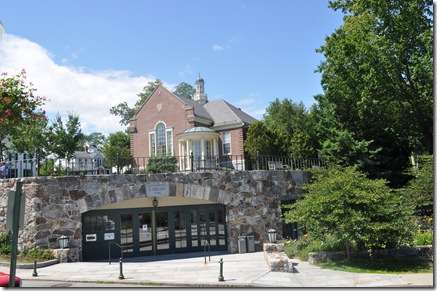
The Camden Public Library in Camden, Maine is a magnificent example of stately architectural and landscape design, and of the citizenry prioritizing the most important building in town. When visiting a few weekends ago, I was struck by the 1996 addition to the library, and how the architect, John Scholz, approached the design with a careful hand. The addition was built UNDER the existing library and grounds, with a new lower level entry at the side street.
Street view
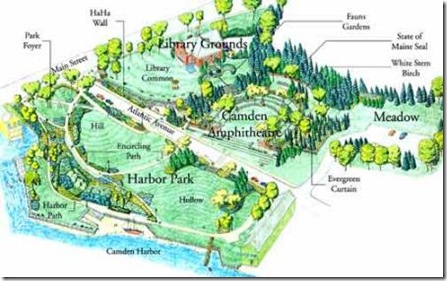
Architect’s renderings of the grounds (from the library’s website)
Corner view
New entry
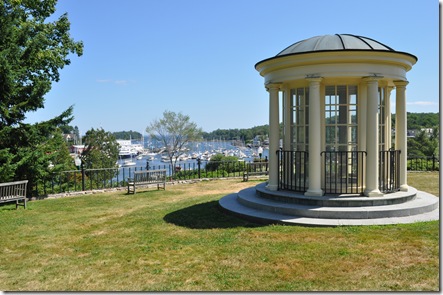
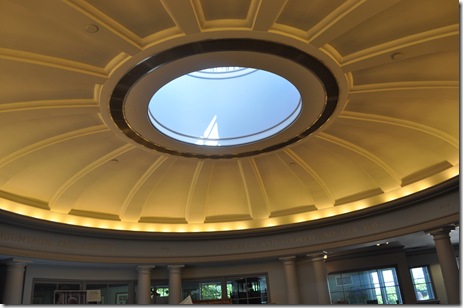
The existing library and its views across the Olmstead-designed Harbor Park to the harbor is breathtaking and unchanged, aside from a lantern-like glass building on the lawn that serves as an oculus/skylight for the new spaces below.
From Library
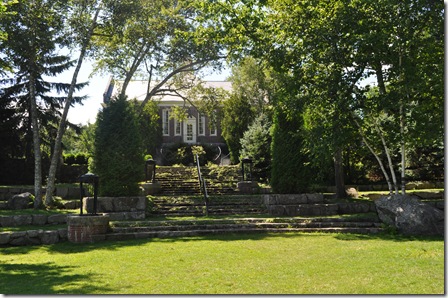
Toward library from Amphitheater
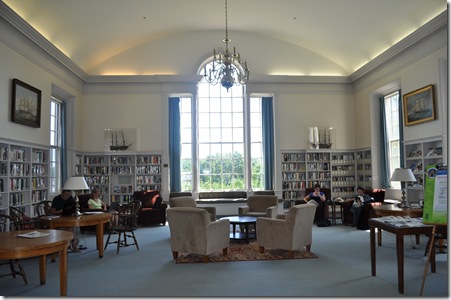
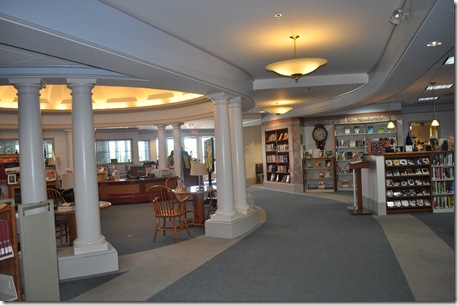
Because of the glass entry to the street, the oculus and roof windows, the new lower level spaces are light-filled and pleasant. The interior spaces are elegantly finished similarly to the historic library above.
First Floor
Lower Level
Detail of oculus
From the library’s website:
“On March 23, 1896, the citizens of Camden voted to establish a free public library to be known as the Camden Public Library. The proud townspeople of Camden raised the money to build this library through various fundraising efforts. No assistance was provided by library philanthropist Andrew Carnegie. Mary Louise Curtis Bok donated the land for the library in 1916. Parker Morse Hooper and Boston architect Charles G. Loring offered building plans. The cornerstone was laid on August 17, 1927 and the Library opened its doors on June 11, 1928 with Miss Katherine W. Harding serving as the first librarian.
In 1996 the library underwent a great expansion under the south lawn. The opening of this Centennial Wing allowed the library to accommodate larger collections and computer-based technology without compromising the scenic or historic value of the original building.”
Most of our existing New England libraries are too small for current requirements and many of them could use an update and more space. There are a lot of examples of modern buildings being stuck on these old venerable structures, or even of libraries moving to new buildings on the outskirts of town, where parking and land is available. Because the addition was funded by the citizens and businesses of Camden, there were no federal or state mandates on parking, number of meeting rooms, etc. It was such a pleasure to see Camden’s solution, which demonstrates pride in the historic structure, and an optimism for the new.
A brief history of the library and adjacent grounds also from the Camden Library website:
“Constructed in 1928, The Camden Public Library, the only library in the village of Camden, Maine, sits at the highest point on Main Street. Architects Parker Morse Hooper and Charles Greely Loring chose to position their building close to the street, under the shade of existing elms and maples – a more direct relationship with its surrounding built environment rather than its larger landscape scenery.
The grounds of the Camden Public Library create a distinctly unique, highly articulated series of landscape experiences, the centerpiece of which is a public outdoor garden amphitheater. Designed by the renowned landscape architect Fletcher Steele, this landscape is one of his best works of art. It was designed and constructed between 1928 and 1931, and funded by local patron of the arts, Mary Louise Curtis Bok. Steele’s landscape design is an important transitional composition that blends elements of the traditional Neoclassical with the ‘new’ ideas of the French Moderne (Art Deco) and successfully marries the ideals of the Renaissance Italian garden theater with the richness of Maine’s native landscape. The popularity and unique qualities of the amphitheater immediately led to the christening of the site as the “Camden Amphitheatre”.
The library building is a long rectangular Colonial Revival structure whose primary axis runs southwest to northeast, parallel to Camden’s Main Street. From the rear of the library, the back door opens onto a secondary axis, linking the library to the Amphitheatre’s central lawn at an oblique angle. The primary axis for the Amphitheatre runs north to south, aligned with the primary views to the harbor. Experts have celebrated the use of this bent axis as one of the first steps in landscape architecture’s move from Classical Revival to French Moderne (Art Deco).
Across Atlantic Avenue, the two-acre Harbor Park, designed by the Olmsted Brothers between 1928 and 1935, continues and extends the views from the Amphitheatre toward the harbor and its busy waterfront. This park retains its own, aesthetically distinct design vocabulary, and remains a separate yet intimately connected, companion to the Amphitheatre. The park was designed in concert with the Amphitheatre, though its naturalistic design and informal planting program contrast significantly with the structured design of the Amphitheatre.
The Camden Amphitheatre retains its historic integrity, setting, original materials and the quality of original workmanship and design. Fieldstone, brick, grass and native trees and shrubs weave their way throughout the Amphitheatre, and wrought iron rails, light standards, gates and arches add grace and French-inspired Art Deco overtones to the carefully executed, highly detailed landscape design.
For more information, visit the library’s website, or the library itself! The Camden Library, Camden Harbor Park and Amphitheatre are located just off Route 1, on Atlantic Avenue, in downtown Camden.
